Tools
How to Use the Weather and Radar Tools — Step by Step
Published · Last checked October 2026
The weather tools show what each Beaufort force looks like, decode a Shipping Forecast and give a go / no-go verdict; Weather School teaches clouds, fronts, synoptic charts, sea states and forecast terms in nine levels; and the radar simulator lets you set up a real-looking small-boat radar and use it for navigation and collision avoidance. Learn each one below, then test yourself with 20 random questions in the Weather & Radar ID game.
1. The weather tools
Open the weather tools. Three tabs sit across the top, and each has its own link (#beaufort, #forecast, #go-no-go), so you can bookmark the one you use most.
Beaufort explorer
- Drag the slider, or tap a number from 0 to 12 underneath it, to pick a force.
- Watch the animated sea: wave height and steepness, white horses, spray and spindrift, the sky, and the yacht's heel and sail plan all change with the force. The anemometer shows the mean wind in knots.
- Read the panel: the mean wind, probable wave height, what the sea looks like, and the sail plan and advice for a 10 m cruiser.
- Remember the note under the panel: wave heights are for the open sea. Near the coast, and with wind against tide, the sea is shorter and steeper.
Forecast decoder
- Pick one of the examples, or type the forecast you heard: the sea areas, a colon, then the forecast.
- The decoder splits it into the four parts that always come in the same order: wind, sea state, weather, visibility.
- Tap any highlighted word for its official Met Office meaning. Recognised sea areas show as dark pills above.
- Read the 'In plain English' line under each part: forces become knots, and sea state and visibility terms become metres and miles.
Go / no-go check
- Choose your crew's experience. This moves the comfortable and maximum wind limits.
- Set the forecast mean wind, then the gusts (which can never be less than the mean), the visibility and the daylight in hand.
- Tick a gale warning or wind against tide if they apply, and work through the 'Before you go' checklist.
- Read the verdict and every reason listed under it. A gale warning always gives NO-GO.
2. Weather School
Weather School is a game in nine levels: Cloud Spotter, Reading the Sky, Frontal Sequence, Frontal Passage, Synoptic Chart, Coastal Effects & Fog, Forecaster's Challenge, Sea State Spotter and Shipping Forecast Ace. Score 50% on a level to earn a star and unlock the next; 80% earns two stars and a perfect run three. Timed levels give bonus points for fast answers. Progress is saved in your browser.
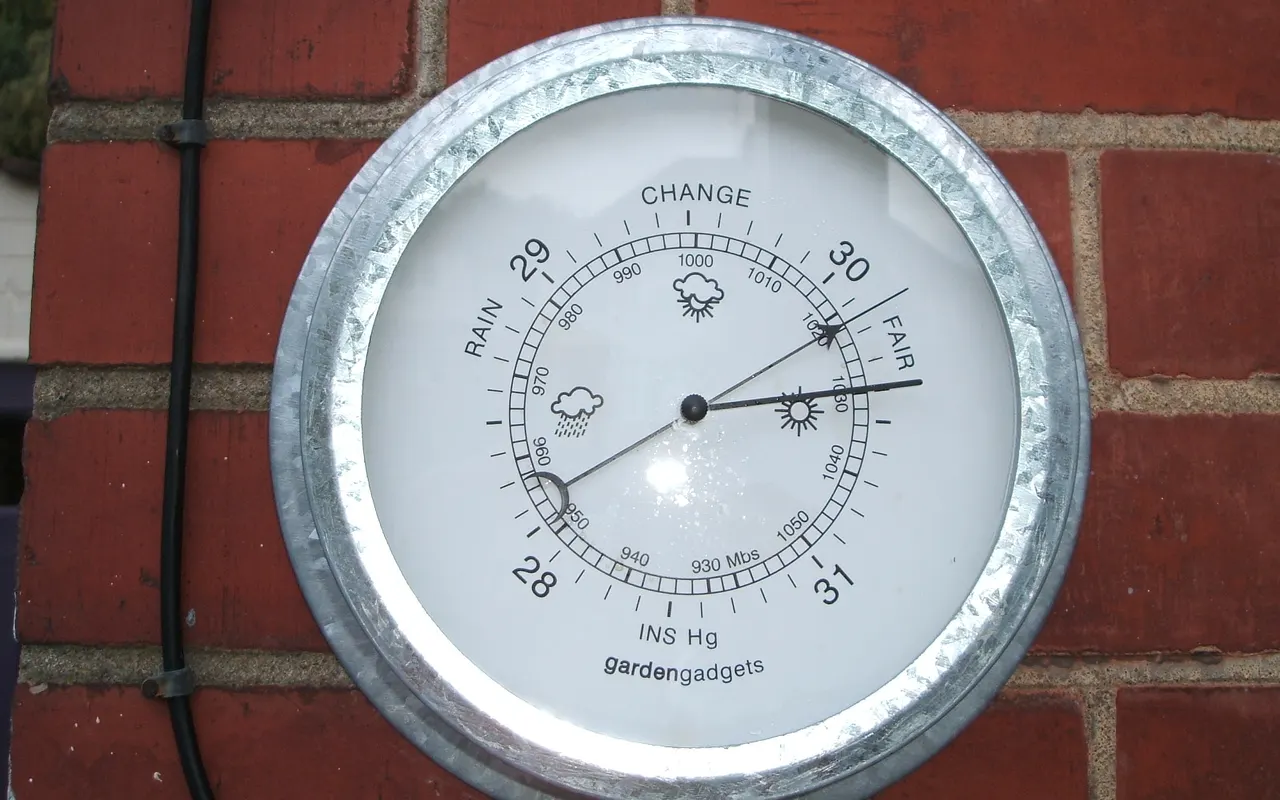
- Frontal Passage: drag the time slider under the sky picture and watch the barometer, wind dial, temperature, visibility and barograph change. The red line on the barograph marks the moment you have dragged to.
- Synoptic Chart: red semicircles are the warm front, blue triangles the cold front, the shaded wedge is the warm sector. After you answer, the wind arrow at the point is revealed.
- Sea State Spotter: the Beaufort explorer's sea is set to a random force. Read the waves, sails and anemometer and name the force.
- Shipping Forecast Ace: a line of forecast with one term highlighted, as in the decoder. Name its official meaning against the clock.
3. The radar simulator
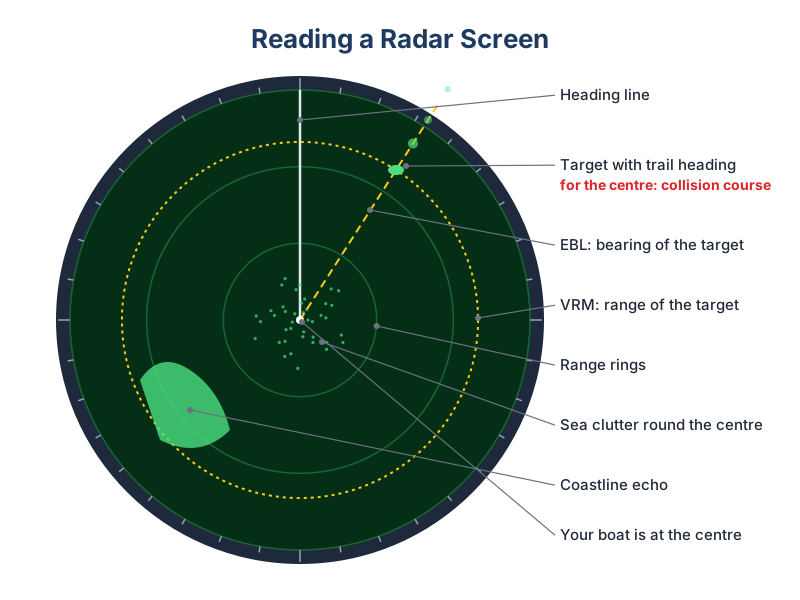
The radar simulator is a small-boat radar with every control live. The screen (the PPI) has your boat at the centre, a heading line showing where the bow points, range rings, and a bearing scale round the edge. The corners show the orientation (H UP or N UP), RM for relative motion, the range and ring spacing, the gain, sea and rain settings, your heading, and the EBL and VRM readouts.
Setting up the picture
- Range: press + or − to choose a scale. Use the shortest range that shows what matters, and range out every few minutes.
- Gain: turn it up until a light speckle just shows across the screen, then back off a little.
- Tune: adjust for the longest tune bar.
- Sea (STC): add just enough to thin the clutter round the centre. Too much wipes out small boats close to you.
- Rain (FTC): use it only while a shower is on the screen, to see hard targets inside it.
Measuring range and bearing
- Switch on the VRM and lay the ring on the inner edge of the echo. Read the range in the bottom-right corner.
- Switch on the EBL and swing it through the centre of the echo. Use ‹ › for half-degree steps.
- Check the readout's last letter: R means relative (head-up), T means true (north-up). True = relative + heading.
- Select N UP to compare the picture with the chart and plot true bearings; H UP matches the view from the helm.
Collision avoidance
Switch on trails. In relative motion a trail shows the line the target will follow past you: if it points at the centre, the target is on a collision course; how far the extended line passes from the centre is the closest point of approach (CPA). An echo that stays on the EBL while the range closes has a steady bearing, which means risk of collision (COLREGs Rule 7). In fog, Rule 19 applies to every vessel detected by radar alone.
| Control | What it does | Common mistake |
|---|---|---|
| Range | How far the screen reaches | Staying on a short range and missing fast ships |
| Gain | Receiver sensitivity | Too low hides yachts; too high hides everything in speckle |
| Tune | Peaks the receiver | Ignoring a short tune bar |
| Sea (STC) | Suppresses wave echoes close in | Turning it right up and losing nearby boats |
| Rain (FTC) | Breaks up showers | Leaving it on after the shower has passed |
| EBL | Bearing line from the centre | Plotting a relative bearing as true |
| VRM | Range ring you can move | Measuring to the centre or far edge of the echo |
| Trails | Where each echo has been | Reading relative trails as the target's real course |
Missions and free play
The Missions tab has twelve tasks, from setting the gain to judging a CPA in fog. Each mission rings the control it is about. Press Check when you think the picture is right; each wrong check costs a star. In tap missions, tap the echo the prompt names. In live missions, the clock runs at 30 times real speed: watch for the number of minutes shown before answering. Free play gives you a coast, buoys, a racon, ships, a yacht and a moving shower with every control: tap any echo to see what it is, with its bearing and range.
4. Test yourself: the Weather & Radar ID game
The Weather & Radar ID game deals 20 random questions a round from a bank of about 30 per tool. Every picture is the real tool: the Beaufort sea, the forecast decoder, the go / no-go check, the cloud photos, the synoptic chart, the frontal simulator and the radar screen and control panel. Choose Weather, Radar, or Both (ten of each). Some questions show a live tool: try it before you answer.
These tools are learning aids, not navigation equipment. Always use the official forecast, your own radar's manual and a proper lookout at sea.